Post by mnwoodbee on Feb 3, 2020 18:34:28 GMT -5
Hello, thought of sharing a build on a vacuum table I built modeled after a industrial router.
I've made three versions of this with minor adjustments. This can easily be scaled to a smaller size and shop vac. A shop vacuum has great power as a pump, My first table was for a AR basic 2x3 table. My second was for a 4x4 cnc, which my concern was the shop vac wasn't going to supply the adequate air volume. I was pleasantly surprise. My current version I made small adjustments for my AR16.
It uses Mdf ultra lite which can be found at - industrial lumber suppliers to businesses. Ultra lite is mdf that is less compressed, so its more spongy allowing air to flow through.
*Mdf can be used but it has far less air flow ability.
The vacuum table is made of
-2 layers of mdf
-a top surface (spoil board) of ultra lite
silicone
hose adapter/fittings
**This build will lesson your Z travel by roughly 2 inches.**
Below ill describe my last version-
I used mdf with laminate on one side, Raw mdf will do if you don't have access to this type.
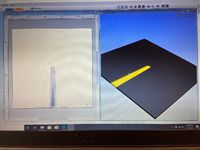
-The base layer is solid with a air channel routed into it. This channel is 2.25 inches at the round end(my vac hose) The out going end this time is 4 inches wide, the air tube is flared to fit a 3d printed port. I did this to allow for pass through of material as my earlier versions had a pvc elbow sticking up.
- The second layer is the grid, cut 1/4 deep with the hole in the center 2.25 inches cut through.
- the air channel should be sealed with something-- wax, laquer i've used.
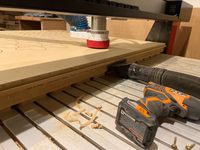
- Fly cut your table this will be on, in this case its the factory mdf runners, if you remove these to save Z travel you'll have to shim/level the low spots of the aluminum extrusion with shims. If you don't start with a level base your table will follow the irregularities.
- assemble the base with the grid pre-drilling and sunking screws, This time around I milled a bolt pattern for some hex bolts to hold the vac table to the machine table. Prior I screwed long screws into the 1 inch mdf runners.
-Silicone the entire perimeter of the vac table focusing on the seam of the 2 layers
-* check sunk screws* Fly cut the grid that's now attatched to the machine.
-The 3d printed dust port is silicone in
-at this point you add the ultra lite to the top as the spoil surface. Its is good idea to seal the perimeter with wax, silicone to limit the air draw to the surface.
* you must fly cut both sides of the ultra lite to get rid of the pressed surface.*
you are good to go! This table set up has increase my production speed and even reduced the use of tabs with the bits/speeds and feeds I use. 1/8 BB to 3/4 plywood having enough force to suck down bows. I have used the same Rigid shop vac for this table for 2 years with heavy production of some runs 11 hrs. The vac never overheated, or strained.
Now only if I could get user posted gadgets to download......


